We’re reader-supported — some links are affiliate links. Learn more →

Skip to content

Independent software research. Some links may earn us a commission at no extra cost to you. Learn more →

ICode

Author: admin

  • How to Set Up DreamHost: Hosting, Step by Step

    How to Set Up DreamHost: Hosting, Step by Step

    Home / Hosting / Guides / How to set up DreamHost

    Tutorial · hosting · updated October 8, 2026

    How to set up DreamHost: a practical walkthrough

    DreamHost is a long-standing web host with a control panel that covers domains, email, and one-click WordPress installs in one place. This walkthrough takes you from choosing a plan to a working WordPress site on your own domain.

    DreamHost web hosting homepage
    DreamHost official homepage (image: dreamhost.com)

    Independent analysis. This page may contain affiliate links. Some links here are referral links; if you sign up through one we may earn a reward at no extra cost to you, and it never changes what we recommend. We are an independent publisher and are not affiliated with, endorsed by, or an official partner of any tool mentioned. See our Affiliate Disclosure.

    TL;DR

    • Pick the hosting type that matches your site, not the cheapest line.
    • Register or connect your domain during checkout to save a step.
    • Use the one-click WordPress install for a clean starting point.
    • Point DNS carefully and keep the old site up until the new one resolves.
    • Run through permalinks, forms, and email after any migration.

    On this page: What this covers · Before you start · Choosing a plan · Registering or connecting a domain · Installing WordPress · Pointing your domain · Moving an existing site · Where this fits

    What this covers

    Setting up hosting is mostly a matter of doing a few things in the right order. DreamHost bundles domain registration, email, and WordPress installs into one control panel, which keeps the moving parts in one place.

    The steps below assume a new site. If you are moving an existing one, the migration section covers the extra checks that matter.

    Before you start

    • A domain name in mind, or an existing domain you will point at the host.
    • An email address for account and payment confirmations.
    • An idea of whether you want shared hosting or a managed WordPress setup.
    • A strong password ready for your new admin account.
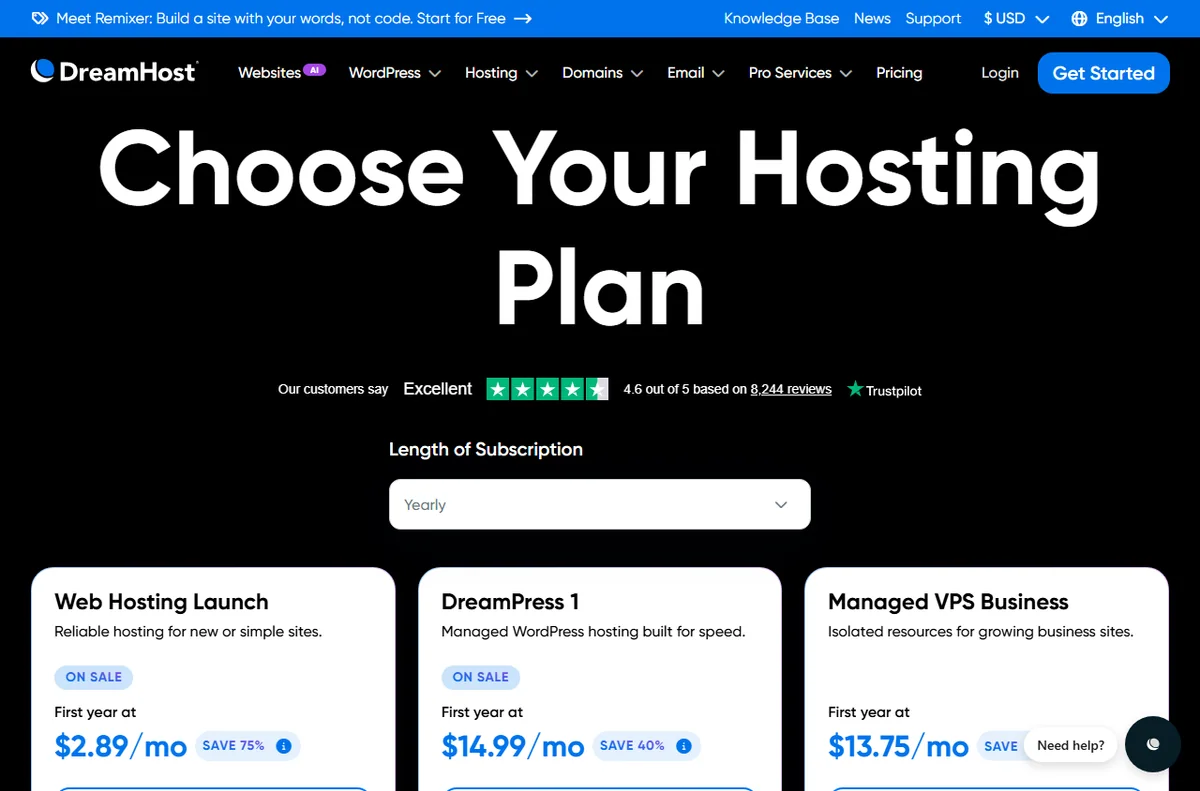
    DreamHost web hosting plans page
    DreamHost hosting plans (image: dreamhost.com)

    Choosing a plan

    The main decision is the type of hosting, because it shapes the tooling and the support you get. Term length and included domains then set the day-to-day cost.

    Decision What it affects Pick it when
    Hosting typeThe kind of server and tooling you getYou want simple shared hosting or a managed WordPress path
    Term lengthHow much you pay up front and when it renewsA longer term fits your budget and you are settled on the host
    Included domainsHow many sites and domains you can hostYou run more than one small site
    Email hostingWhether mailbox features come with the planYou want business email alongside the site
    Based on publicly documented behaviour, checked October 8, 2026.
    DreamHost domain registration page
    DreamHost domains (image: dreamhost.com)

    Registering or connecting a domain

    During checkout you can register a new domain or connect one you already own. If you already have a domain, you can keep it where it is and point it at the host, or transfer it if you would rather manage everything in one place.

    Wait for the registration or transfer to complete before you build the site on that domain, so the install is tied to a name that already works.

    DreamHost WordPress hosting page
    DreamHost WordPress hosting (image: dreamhost.com)

    Installing WordPress

    The installer creates the database and core files for you, so you can go straight to choosing a theme and adding pages.

    1. From the control panel, choose the one-click WordPress install.
    2. Select the domain you want the site to live on.
    3. Set a strong admin password and a real admin email you can access.
    4. Open the new site and remove any default content you do not want.
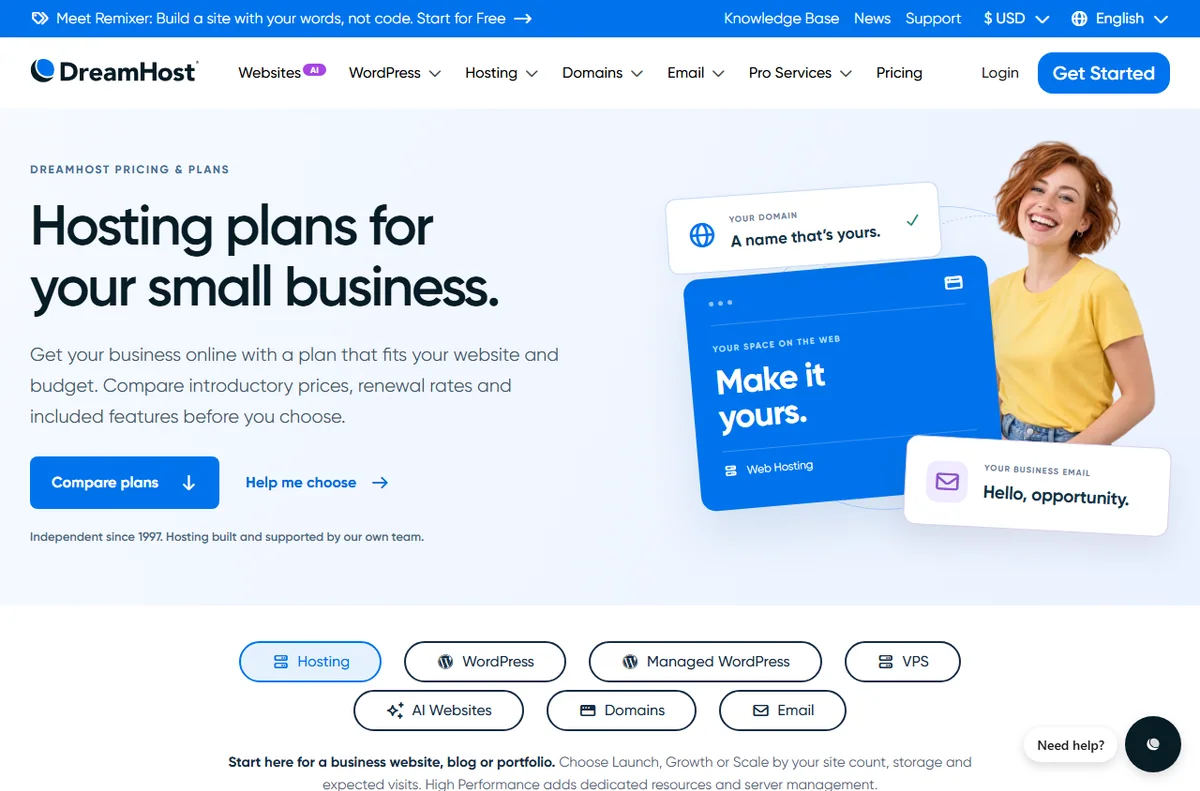
    DreamHost plans and pricing page used during sign-up
    DreamHost sign-up (image: dreamhost.com)

    Pointing your domain

    Point the domain by updating its nameservers at your registrar, or by adding the records the panel shows you. Propagation can take a while, so keep any previous site online until the new one resolves reliably.

    If email is involved, double-check the mail records before you switch, so messages keep arriving without a gap.

    DreamHost hosting features page
    DreamHost features (image: dreamhost.com)

    Moving an existing site

    To move an existing site, use the panel tools to copy files and the database, or migrate manually with a plugin. After the move, check permalinks, forms, and outgoing email, since these are the usual trouble spots.

    Review the site on the new host before you point DNS at it, so visitors never see a half-finished move.
    DreamHost account sign-in page
    DreamHost sign-in (image: dreamhost.com)

    Where this fits in your wider stack

    For a closer look at the host itself, read the independent DreamHost review. To compare it with the wider market, see best web hosting for small business and best hosting for bloggers, then plan for later increases with hosting renewal pricing.

    Frequently asked

    Can I host more than one site on one plan?

    Many plans allow several domains and sites. Check the plan details on the official pricing page for the current limits before you buy.

    Do I have to register my domain with DreamHost?

    No. You can point a domain registered elsewhere at your hosting, or transfer it if you would rather manage everything in one place.

    Is WordPress installed automatically?

    There is a one-click WordPress install in the control panel that sets up the database and core files for you.

    How long does DNS take to update?

    It varies by registrar and location. Keep your previous site running until the new one reliably resolves for you.

    Ready to set up DreamHost?

    Choose a hosting type that fits your site, then follow the install steps.

    Referral link — we may earn a reward if you sign up, at no extra cost to you. We are an independent publisher. See our Affiliate Disclosure.

    See also: What is DreamHost?.

  • How to Use Kinsta for a Small Business

    How to Use Kinsta for a Small Business

    Home / Hosting / Guides / How to use Kinsta for a small business

    Use case · hosting · updated October 8, 2026

    How to use Kinsta for a small business: a practical workflow

    A small business rarely wants to think about servers, but it does need sites that stay up, load quickly, and can be changed without fear. Kinsta is managed WordPress hosting, so the platform handles the infrastructure while your team works on the site.

    Kinsta managed WordPress hosting homepage
    Kinsta official homepage (image: kinsta.com)

    Independent analysis. This page may contain affiliate links. Some links here are referral links; if you sign up through one we may earn a reward at no extra cost to you, and it never changes what we recommend. We are an independent publisher and are not affiliated with, endorsed by, or an official partner of any tool mentioned. See our Affiliate Disclosure.

    TL;DR

    • Make staging the default place to test every change.
    • Keep backups running and prove you can restore them.
    • Turn on caching, then measure key pages before and after.
    • Run several sites under one account to cut overhead.
    • Give each person the access they need and nothing more.

    On this page: What this covers · A small-business workflow · Staging for safe changes · Backups you can trust · Caching and performance · Managing more than one site · Team access and handovers · Where this fits

    What this covers

    This guide is about how a small business actually uses managed WordPress hosting day to day, rather than how to pick a plan. The value shows up in a repeatable workflow: test changes safely, keep a recent restore point, and keep the site fast.

    None of these habits require a developer on staff. They are small routines that prevent the expensive kind of incident, the one where a routine update takes the storefront offline on a busy afternoon.

    Kinsta homepage highlighting the managed WordPress workflow
    Kinsta features (image: kinsta.com)

    A small-business workflow

    Treat these four areas as the backbone of how you run the site. Each one has a first action you can take this week.

    Area Why it matters First action
    StagingLets you test plugins and design changes without touching the live siteCreate a staging copy before your next update
    BackupsProtects revenue if an update breaks the siteConfirm backups run, then practise one restore in staging
    CachingSpeeds up pages and absorbs traffic spikesEnable caching and re-test the key pages
    Multi-siteKeeps several properties under one loginGroup your sites in one account and label them clearly
    Based on publicly documented behaviour, checked October 8, 2026.
    Kinsta guide on using staging environments
    Kinsta staging (image: kinsta.com)

    Staging for safe changes

    Staging is a full copy of your site on its own URL. Push plugin updates, theme edits, or content experiments there first, check the result, then move the change to live.

    This single habit prevents most downtime. If an update breaks a layout or a checkout flow, you find out on a private copy instead of in front of customers.

    Kinsta documentation on backups and site management
    Kinsta docs (image: kinsta.com)

    Backups you can trust

    A backup you have never tested is only a guess. Confirm that automatic backups are active, then walk through a restore in staging so you know the steps and how long they take.

    Add a manual backup before large changes such as a major plugin upgrade. That gives you a clean point to return to if something goes wrong.

    Kinsta managed WordPress hosting performance page
    Kinsta WordPress hosting (image: kinsta.com)

    Caching and performance

    Managed caching does most of the speed work, but content still matters. Compress large images, keep your plugin list lean, and measure your key pages before and after you change anything.

    Measuring beats assuming. A page that feels faster is not the same as one that loads faster for a visitor on a slower connection.

    Kinsta pricing page with plans for multiple sites
    Kinsta pricing (image: kinsta.com)

    Managing more than one site

    If you run a main site plus a landing page or two, keeping them in one account simplifies billing and access. Label each site by purpose so anyone on the team knows what is safe to change and what needs a second pair of eyes.

    Kinsta MyKinsta sign-in page for team access
    Kinsta sign-in (image: kinsta.com)

    Team access and handovers

    Give each team member their own login rather than sharing one account, so changes can be traced to a person. When someone leaves, revoke their access and rotate any shared credentials the site relies on, such as mail or payment integrations.

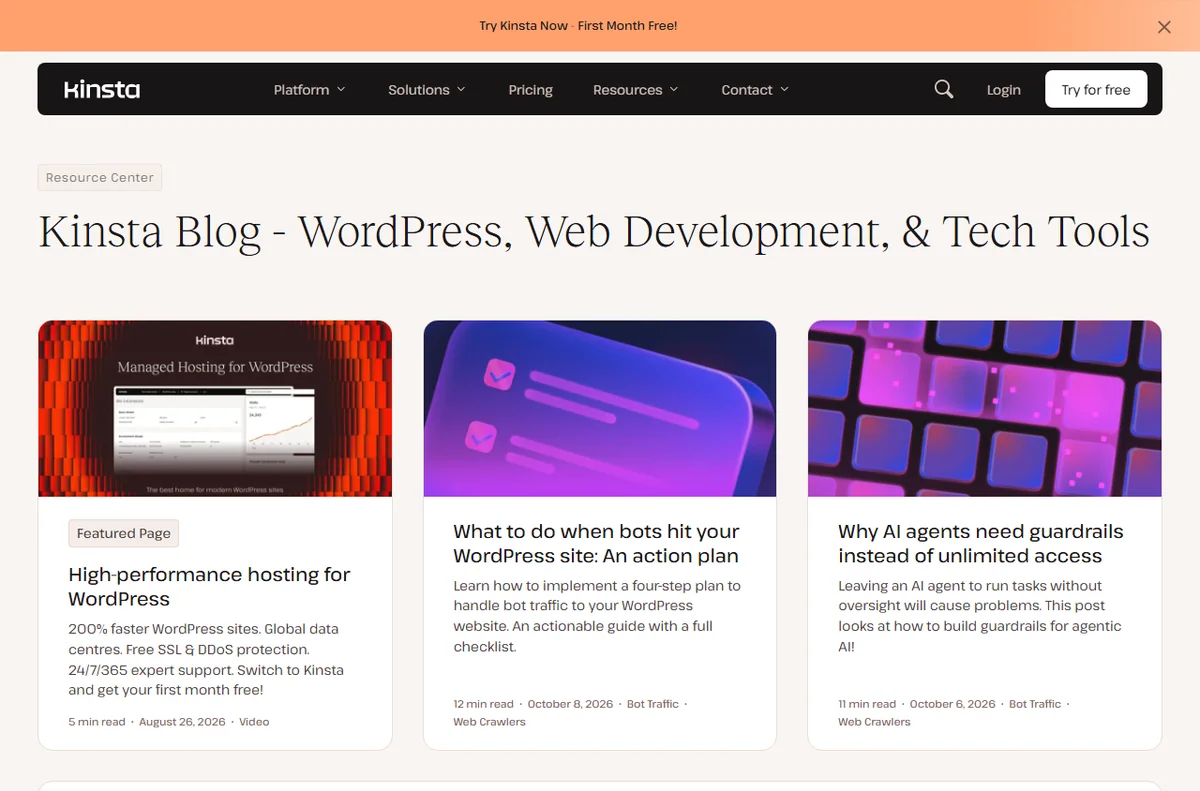
    Kinsta blog with WordPress guides and tutorials
    Kinsta blog (image: kinsta.com)

    Where this fits in your wider stack

    If you are still choosing a host, start with the independent Kinsta review and the Kinsta vs Hostinger comparison. To see how it stacks up against the wider market, read best web hosting for small business, and budget for later changes with hosting renewal pricing.

    Frequently asked

    Can a small business run staging without a developer?

    Yes. Staging is a copy of the site on its own URL, and pushing a change back to live is a built-in action rather than a manual file transfer.

    How often should I back up?

    Automatic backups run on a schedule, so the useful habit is to add a manual backup before any large change and keep a recent restore point on hand.

    Will caching break my forms or checkout?

    Test those paths after enabling caching. If something misbehaves, most platforms let you exclude specific pages from the cache.

    Do I need a separate account for each site?

    No. Several sites can sit under one account, which simplifies billing and lets you manage access from a single place.

    Put a small-business workflow in place

    Start with staging, backups, and caching, then grow the account with your sites.

    Referral link — we may earn a reward if you sign up, at no extra cost to you. We are an independent publisher. See our Affiliate Disclosure.

  • How to Set Up Kinsta: WordPress Hosting, Step by Step

    How to Set Up Kinsta: WordPress Hosting, Step by Step

    Home / Hosting / Guides / How to set up Kinsta

    Tutorial · hosting · updated October 8, 2026

    How to set up Kinsta: a practical walkthrough

    Kinsta is managed WordPress hosting, which means the platform handles the server layer while you focus on the site itself. This walkthrough covers the decisions that matter at setup: picking a plan, adding a site, pointing your domain, and going live without downtime.

    Kinsta managed WordPress hosting homepage
    Kinsta official homepage (image: kinsta.com)

    Independent analysis. This page may contain affiliate links. Some links here are referral links; if you sign up through one we may earn a reward at no extra cost to you, and it never changes what we recommend. We are an independent publisher and are not affiliated with, endorsed by, or an official partner of any tool mentioned. See our Affiliate Disclosure.

    TL;DR

    • Match the plan tier to peak traffic and staging needs, not to a guess.
    • Add the site first and build on the temporary URL before touching DNS.
    • Point your domain last, so the old site stays up until the new one resolves.
    • Confirm SSL, caching, and forms before you call it live.
    • Keep a staging copy for every future change.

    On this page: What this covers · Before you start · Choosing a plan · Adding your first site · Pointing your domain · SSL, caching and going live · Migrating an existing site · Where this fits

    What this covers

    Kinsta is managed WordPress hosting, which means the platform runs the servers, patching, and caching layer while you focus on content and design. That removes a lot of routine maintenance, but it still helps to set the account up in the right order.

    Everything below is reversible. You can add a site, build it on a temporary URL, and only switch DNS when you are satisfied. Nothing here locks you in on day one.

    Before you start

    • The domain you plan to use, and access to its DNS records at your registrar.
    • An email address you can check, for verification and account messages.
    • A note of any existing WordPress site you may want to migrate later.
    • A rough sense of expected traffic so you can match it to a plan tier.
    Kinsta pricing page with managed WordPress hosting plans
    Kinsta pricing (image: kinsta.com)

    Choosing a plan

    Plans are organised by hosting type and by the resources a site can draw on. The right tier depends less on today’s traffic than on your peak, your staging needs, and how many sites you run.

    Decision What it affects Pick it when
    Hosting typeWhether the plan targets WordPress sites, apps, or databasesYou run a WordPress site and want managed tooling
    Resource tierThe ceiling on visits and storage before you need to upgradeYour peaks are uneven or you host media-heavy pages
    Number of sitesHow many installs you can add under one accountYou manage a portfolio rather than a single site
    Environment needsAccess to staging and backup featuresYou change plugins or code often and want a safe preview
    Based on publicly documented behaviour, checked October 8, 2026.
    Kinsta managed WordPress hosting feature page
    Kinsta WordPress hosting (image: kinsta.com)

    Adding your first site

    Building on the temporary URL means you can install themes and plugins, and design the whole site, before any public visitor sees it.

    1. From the dashboard, choose to add a site and select WordPress.
    2. Pick a data centre close to your main audience to reduce latency.
    3. Name the site and let the platform provision it; this usually only takes a few minutes.
    4. Open the temporary URL and confirm the default install loads correctly.
    Kinsta documentation site covering domains and setup
    Kinsta docs (image: kinsta.com)

    Pointing your domain

    Add your domain in the site settings, then copy the DNS records the dashboard shows you. If the domain is registered elsewhere, you either change its nameservers or add the specific records at your registrar.

    Changes can take time to propagate across the internet. Keep the old site running until the new one resolves reliably everywhere you can test.

    Kinsta homepage highlighting SSL, caching and performance
    Kinsta features (image: kinsta.com)

    SSL, caching and going live

    These four checks catch the majority of post-launch surprises. If a form or checkout misbehaves after caching is enabled, most setups let you exclude that page from the cache.

    1. Confirm the free SSL certificate is issued and that the site forces secure connections.
    2. Turn on the built-in caching and check that key pages still render correctly.
    3. Create a staging copy so future changes stay low risk.
    4. Re-check forms, checkout, and any login pages before you announce the launch.
    Kinsta guide on staging environments for WordPress sites
    Kinsta staging environments (image: kinsta.com)

    Migrating an existing site

    If you already run a WordPress site, the platform offers a migration route that copies files and the database. Start it from the dashboard and provide the source credentials it asks for.

    After the migration, re-check permalinks, scheduled tasks, and outgoing email, since those are the parts most likely to need attention after a move. Compare the old and new site side by side before you switch DNS.

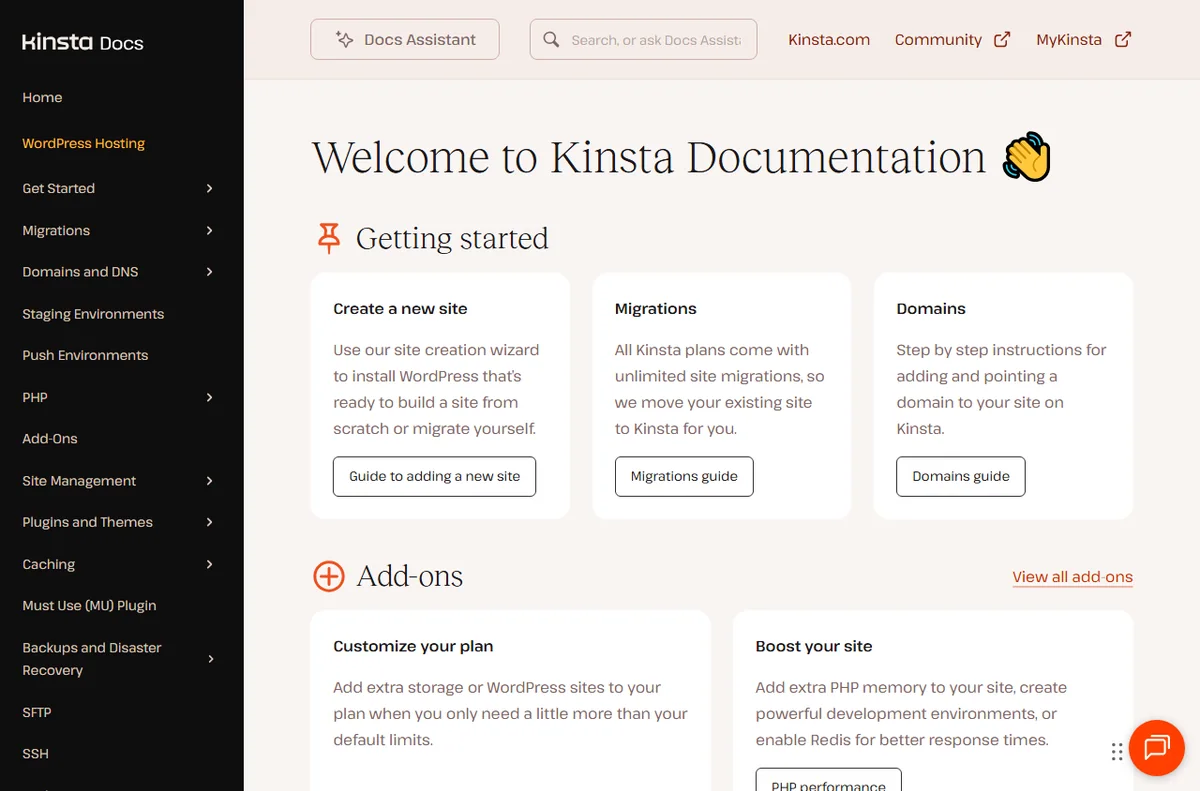
    Kinsta MyKinsta sign-in page
    Kinsta sign-in (image: kinsta.com)

    Where this fits in your wider stack

    If you are still weighing hosts, the independent Kinsta review and the Kinsta vs Hostinger comparison set out the trade-offs. To compare the field more broadly, see best web hosting for small business, and plan ahead for later increases with hosting renewal pricing.

    Frequently asked

    Do I need to move my domain to Kinsta to use it?

    No. You can keep the domain registered where it is and either point its nameservers or add the DNS records the dashboard provides.

    Can I build and test a site before changing DNS?

    Yes. Every new site gets a temporary URL, so you can install themes and plugins and review the result before any public traffic reaches it.

    What happens if I outgrow my plan?

    Plans can be upgraded as needs grow, and the dashboard shows the resources a site is using so you can judge when to move up.

    Is staging included?

    Staging is part of the managed tooling; check the official pricing page for exactly which tiers include which features.

    Ready to set up Kinsta?

    Start with a plan that matches your current traffic and staging needs.

    Referral link — we may earn a reward if you sign up, at no extra cost to you. We are an independent publisher. See our Affiliate Disclosure.

  • How to Use 1Password for a Small Business

    How to Use 1Password for a Small Business

    Home / Security & Privacy / Guides / How to use 1Password for a small business

    Use case · security & privacy · updated October 8, 2026

    How to use 1Password for a small business

    For a small business, the value of 1Password is not the encrypted database itself but the routine it creates: people share access through vaults instead of pasting passwords into chat, and access disappears cleanly when someone leaves.

    1Password home for password and secrets management
    1Password official homepage (image: 1password.com)

    Independent analysis. This page may contain affiliate links. Some links here are referral links; if you sign up through one we may earn a reward at no extra cost to you, and it never changes what we recommend. We are an independent publisher and are not affiliated with, endorsed by, or an official partner of any tool mentioned. See our Affiliate Disclosure.

    TL;DR

    • Shared vaults replace passwords sent over chat.
    • Onboarding is faster when access is granted by vault.
    • Offboarding must remove access in one pass.
    • Safe sharing covers one-off secrets, not just logins.
    • Recovery access should be planned, not improvised.

    On this page: What this covers · Shared vaults for shared work · Onboarding new people · Offboarding cleanly · Sharing secrets safely · Recovery and break-glass access · Where to start · Where this fits in your wider stack

    What this covers

    Most small businesses adopt a password manager to stop the same three habits: passwords sent over chat, one login shared by several people, and no clear record of who can reach what.

    This guide focuses on the routines that fix those habits, using 1Password as the example. It steers clear of quoting plan prices or trial terms, since those belong on the official pricing page.

    1Password password manager product page explaining shared vaults
    1Password features (image: 1password.com)

    Shared vaults for shared work

    The core habit is simple: anything more than one person needs goes into a shared vault rather than a private one. That way access is granted once and updated in one place.

    Keep the number of vaults small and meaningful. A team vault plus a couple of role-specific vaults is usually enough; a vault per project quickly becomes a maze nobody can audit.

    1Password sign-up page used to add people to the account
    1Password sign-up (image: 1password.com)

    Onboarding new people

    When access is organised by vault, onboarding becomes a short checklist rather than a scavenger hunt. You invite the person, add them to the vaults their role needs, and they start from day one.

    Pair the invite with a brief note on expectations: use the manager for every logins, turn on two-factor, and ask for access instead of borrowing it. Setting that tone early saves cleanup later.

    1Password business page covering team accounts and permissions
    1Password for business (image: 1password.com)

    Offboarding cleanly

    Offboarding is where password managers prove their worth, because access is revoked in one place. Remove the person from the account or the relevant vaults, then rotate anything sensitive they could have copied.

    Do not skip rotation for high-value logins such as banking or infrastructure. Leaving a known credential in place after someone leaves is the kind of gap that only shows up in an incident review.

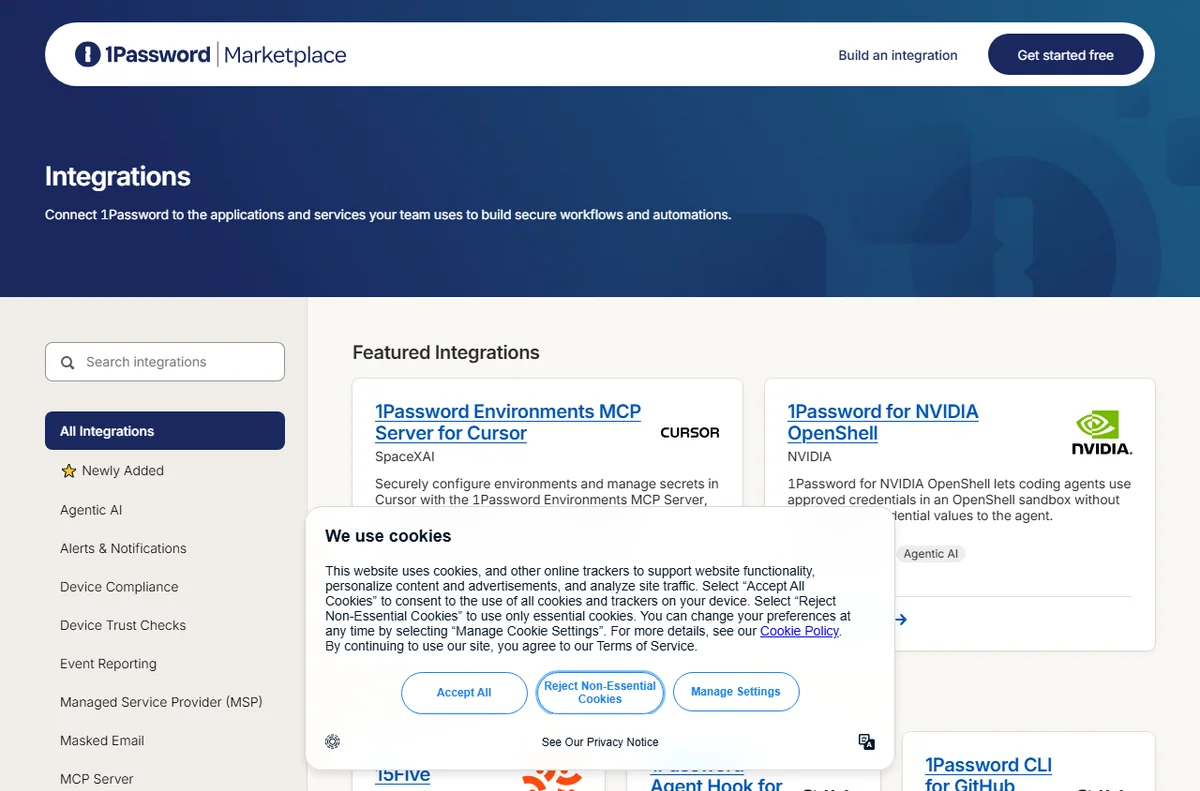
    1Password Marketplace of integrations for secure sharing
    1Password integrations (image: 1password.com)

    Sharing secrets safely

    Not every secret is a login. API keys, Wi-Fi codes and recovery phrases also need a home, and secure notes keep them out of email and chat threads.

    For one-off sharing with someone outside the account, use a link that expires rather than a permanent item. Time-limited sharing matches the way a short-term contractor relationship actually works.

    1Password app sign-in page
    1Password app sign-in (image: 1password.com)

    Recovery and break-glass access

    A password manager becomes a single point of failure if nobody can get in when the wrong person is unavailable. Plan the recovery path before you need it.

    Decide who holds emergency access, where the recovery details live, and how often you verify they still work. A recovery plan nobody has tested is a comforting idea, not a safeguard.

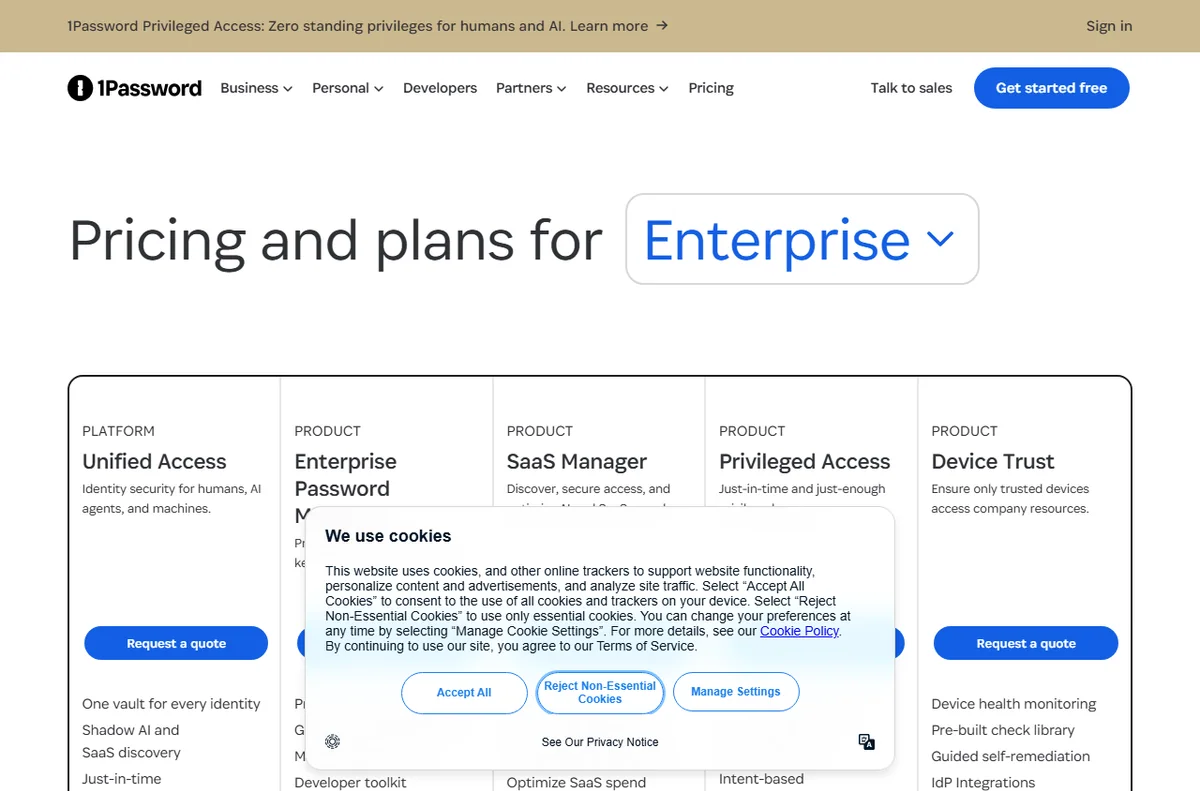
    1Password pricing page with plan tiers
    1Password pricing (image: 1password.com)

    Where to start

    New teams do not need every feature immediately. Use the table below to pick the first routines that match your situation.

    Situation Routine to set up first Why it matters
    Two to five peopleOne shared team vaultReplaces passwords sent over chat
    Frequent hiringAccess by role, not by personOnboarding becomes a checklist
    ContractorsTime-limited sharing linksAccess expires without manual cleanup
    Regulated workTested recovery accessKeeps an audit trail intact
    Owner-run businessA written recovery planAvoids a lockout nobody else can fix
    Based on publicly documented behaviour, checked October 8, 2026.
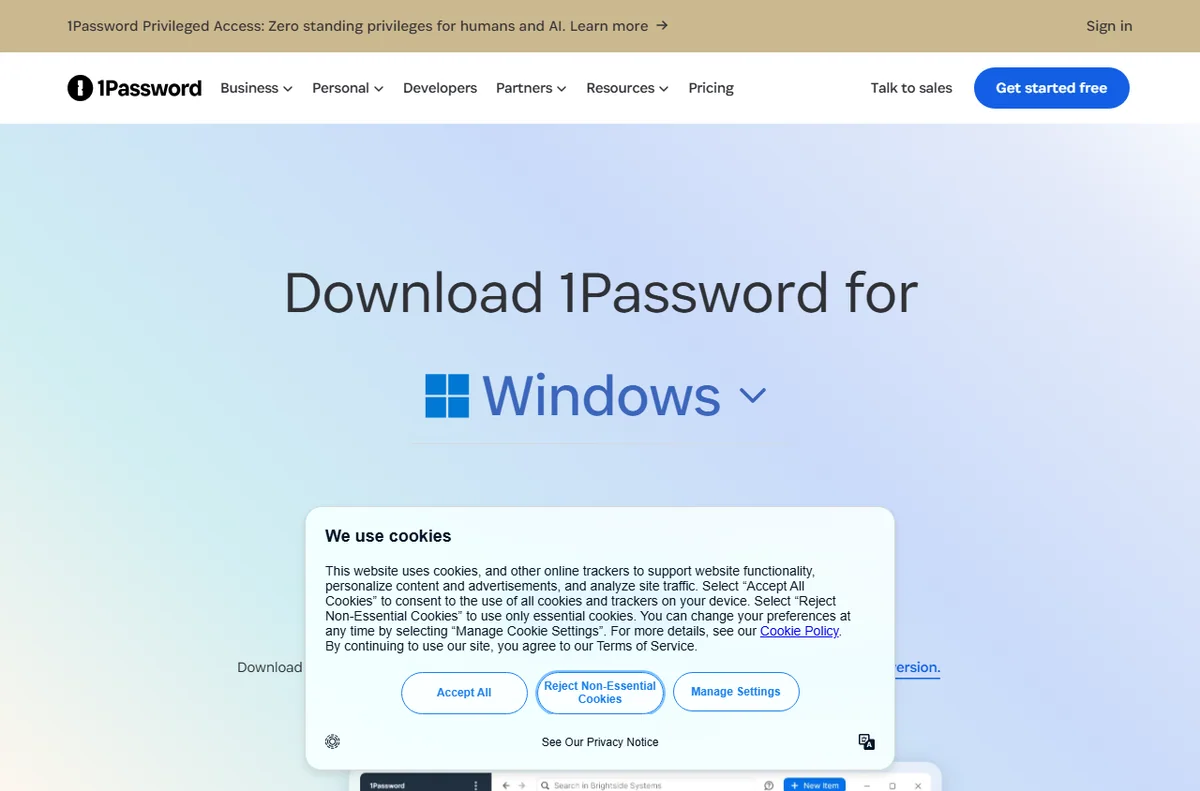
    1Password downloads page for installing the app
    1Password downloads (image: 1password.com)

    Where this fits in your wider stack

    To choose the right tool for a team, read the 1Password vs Bitwarden comparison, then compare the field in the best password managers for small business. Broaden the picture with the best security tools for small business, and if your team works remotely, add the best VPN for small business to the shortlist.

    Frequently asked

    How is a shared vault better than a shared login?

    A shared vault lets each person keep their own account while granting access to the same items. A shared login means one credential known to many people and no clear audit trail.

    What should I check when someone leaves?

    Remove them from the account and relevant vaults, then rotate any high-value credentials they could have saved or copied.

    Can I share a secret with someone outside the team?

    Yes. Use a time-limited share for outside parties so the access expires on its own instead of lingering indefinitely.

    Do we really need a recovery plan?

    Yes. Without one, the manager can lock the whole team out when a single keyholder is unavailable. Test the plan so it works when it matters.

    Use 1Password across your team

    Set up a shared vault and make access a routine rather than an exception.

    Referral link — we may earn a reward if you sign up, at no extra cost to you. We are an independent publisher. See our Affiliate Disclosure.

  • How to Set Up 1Password: Teams and Vaults, Step by Step

    How to Set Up 1Password: Teams and Vaults, Step by Step

    Home / Security & Privacy / Guides / How to set up 1Password

    Tutorial · security & privacy · updated October 8, 2026

    How to set up 1Password: a practical walkthrough

    A password manager only pays off once the whole team actually uses it, and that starts with a clean setup. This walkthrough takes a 1Password account from creation to a first shared vault, then shows how to bring people in without losing control of who can see what.

    1Password home for password and secrets management
    1Password official homepage (image: 1password.com)

    Independent analysis. This page may contain affiliate links. Some links here are referral links; if you sign up through one we may earn a reward at no extra cost to you, and it never changes what we recommend. We are an independent publisher and are not affiliated with, endorsed by, or an official partner of any tool mentioned. See our Affiliate Disclosure.

    TL;DR

    • Create the account with a strong master password you can recover.
    • Start with a small number of vaults, not one per person.
    • Install the browser and mobile apps before inviting anyone.
    • Invite the team and set permissions by vault, not by habit.
    • Turn on two-factor and agree a shared security baseline.

    On this page: What this covers · Before you start · Step 1 — Create the account and choose a plan · Step 2 — Build your first vaults · Step 3 — Install apps and save a first login · Step 4 — Invite the team and set permissions · Step 5 — Enforce good hygiene · Choosing the right plan shape · Where this fits in your wider stack

    What this covers

    1Password stores logins, keys and secure notes behind one strong master password, and it is built for teams as much as individuals. The setup is not difficult, but the choices you make early about vaults and permissions shape everything that follows.

    This guide follows a business setup in order. It avoids quoting plan prices or trial lengths, since those are best confirmed on the official pricing page.

    Before you start

    • A recovery plan for your master password, so a forgotten login does not lock you out.
    • A list of the logins and shared secrets the team reaches for most often.
    • A short agreement on who owns which accounts and who should see them.
    • The email addresses of anyone who will be invited.
    • A device with a modern browser and, ideally, a phone for two-factor.
    1Password sign-up entry for creating an account
    1Password sign-up (image: 1password.com)

    Step 1 — Create the account and choose a plan

    Create the account with an email you control and set a master password that is long and unique. This one password protects everything else, so it deserves more care than any other login you own.

    Store the emergency kit or recovery details somewhere safe and offline. If the account covers a team, decide now whether you need individual or team-based billing, because changing that later touches every user.

    1Password password manager product page explaining vaults
    1Password features (image: 1password.com)

    Step 2 — Build your first vaults

    Vaults are the unit of access control in 1Password, so they do the heavy lifting for permissions. A common mistake is creating a vault per person; a better starting point is a small set organised by function.

    Create a private vault for each person plus a shared vault for the team, then add a separate vault only when a group genuinely needs its own boundary, such as finance or contractors.

    1Password downloads page for installing the app
    1Password downloads (image: 1password.com)

    Step 3 — Install apps and save a first login

    Install the desktop and mobile apps and sign in so the vault syncs across devices. The browser extension is the piece that turns the manager from a filing cabinet into a habit, so add it early.

    Save one real login as a test. Watch how it fills, then confirm it works on a second device. That single loop teaches the whole workflow better than any amount of reading.

    1Password business page for team access and permissions
    1Password for business (image: 1password.com)

    Step 4 — Invite the team and set permissions

    Invite people by email and decide their access vault by vault. Most team members need read access to shared vaults, while a small number need permission to manage them.

    Resist the urge to give everyone full access for convenience. Tight defaults with a clear way to request more access keeps the audit trail meaningful and the blast radius small.

    1Password app sign-in page for daily use
    1Password app sign-in (image: 1password.com)

    Step 5 — Enforce good hygiene

    Setup is not finished until habits are. Turn on two-factor authentication for the account itself, and encourage it for the logins stored inside.

    Agree a short baseline: unique passwords everywhere, no shared logins sent over chat, and a review when someone leaves. Writing it down makes it enforceable rather than aspirational.

    1Password pricing page with plan tiers
    1Password pricing (image: 1password.com)

    Choosing the right plan shape

    The plan question comes down to who needs their own account and how much control you want over access. Use the table below as a starting point.

    Plan shape Who it suits Watch out for
    Single userA founder or freelancer working aloneHard to hand over if the team grows quickly
    Small teamA few people sharing a handful of vaultsDecide vault ownership before you invite anyone
    Team with rolesGroups with different access needsOver-complicated vaults if you plan too finely
    Mixed contractorsStaff plus external helpersMake sure offboarding is quick and complete
    Based on publicly documented behaviour, checked October 8, 2026.
    1Password Marketplace of integrations
    1Password integrations (image: 1password.com)

    Where this fits in your wider stack

    A password manager is one layer of a sensible security setup. Weigh the alternatives in the 1Password vs Bitwarden comparison, then look at the best password managers for small business and the broader best security tools for small business. If remote work is part of your setup, the best VPN for small business is the natural next read.

    Frequently asked

    What happens if I forget my master password?

    Recovery depends on the details you saved at setup, such as the emergency kit. Store them offline and somewhere you will still find them months later.

    Should every person get their own vault?

    Everyone gets a private vault, but shared access should live in a small number of team vaults so permissions stay easy to reason about.

    Do I need two-factor authentication if I use a password manager?

    Yes. Two-factor on the account itself protects the vault, and it is worth enabling for the important logins stored inside as well.

    How many vaults should a small team start with?

    Start with a private vault per person and one shared team vault. Add more only when a group genuinely needs its own boundary.

    Set up 1Password for your team

    Create the account, build your first vaults and invite people with the right access.

    Referral link — we may earn a reward if you sign up, at no extra cost to you. We are an independent publisher. See our Affiliate Disclosure.

  • How to Use PayPal for a Small Business

    How to Use PayPal for a Small Business

    Home / Payments / Guides / How to use PayPal for a small business

    Use case · payments · updated October 8, 2026

    How to use PayPal for a small business

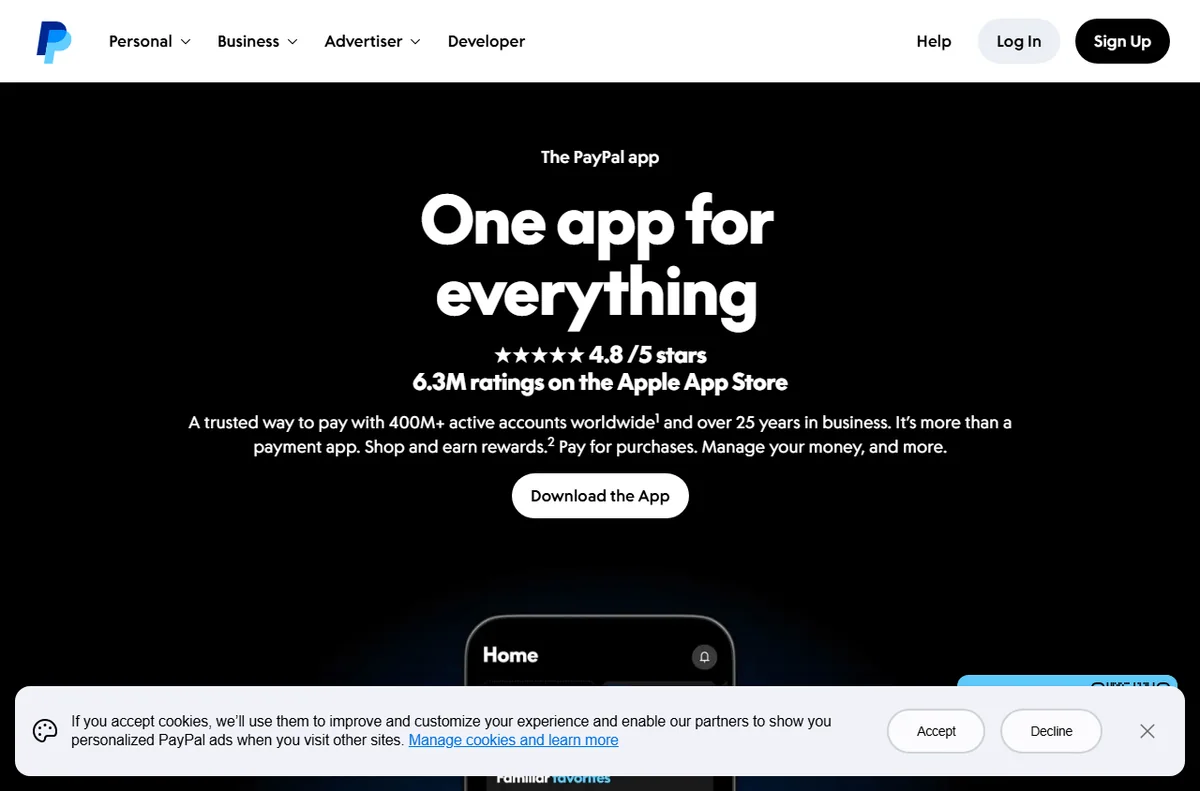
    Once a PayPal account is live, the interesting question is not how to switch it on but where it earns its place. For a small business there are a handful of jobs it does well, and knowing them keeps the account focused rather than cluttered.

    PayPal official homepage for sending and accepting payments
    PayPal official homepage (image: paypal.com)

    Independent analysis. This page may contain affiliate links. Some links here are referral links; if you sign up through one we may earn a reward at no extra cost to you, and it never changes what we recommend. We are an independent publisher and are not affiliated with, endorsed by, or an official partner of any tool mentioned. See our Affiliate Disclosure.

    TL;DR

    • Invoicing is often the first job worth setting up.
    • Checkout buttons let you offer PayPal beside cards.
    • Recurring billing suits memberships and retainers.
    • Refund handling keeps disputes off your desk.
    • Clean reporting makes month-end reconciliation faster.

    On this page: What this covers · Six ways small businesses use PayPal · Invoicing and getting paid · Checkout buttons and site payments · Recurring billing and subscriptions · Refunds and disputes · Reporting and reconciliation · Where to start · Where this fits in your wider stack

    What this covers

    PayPal is rarely the only way a small business gets paid, but it is often the most familiar to buyers. That familiarity is the real asset: a customer who already trusts the brand is one less hesitation at checkout.

    This guide lists the practical jobs PayPal handles well for a small team, then helps you decide which to set up first. It avoids specific fees or plan limits, because those are best confirmed on the official pricing page.

    PayPal business solutions page listing ways to get paid
    PayPal business solutions (image: paypal.com)

    Six ways small businesses use PayPal

    • Invoicing: send a payable invoice by email and let the status track itself.
    • Site checkout: add a payment button or a gateway integration to your store.
    • Recurring billing: charge a subscription or membership on a schedule.
    • Refunds and disputes: reverse a charge and answer a buyer claim from one place.
    • Reporting: reconcile sales, fees and payouts against your bookkeeping.
    • Cross-border payments: receive money from buyers in other countries and currencies.
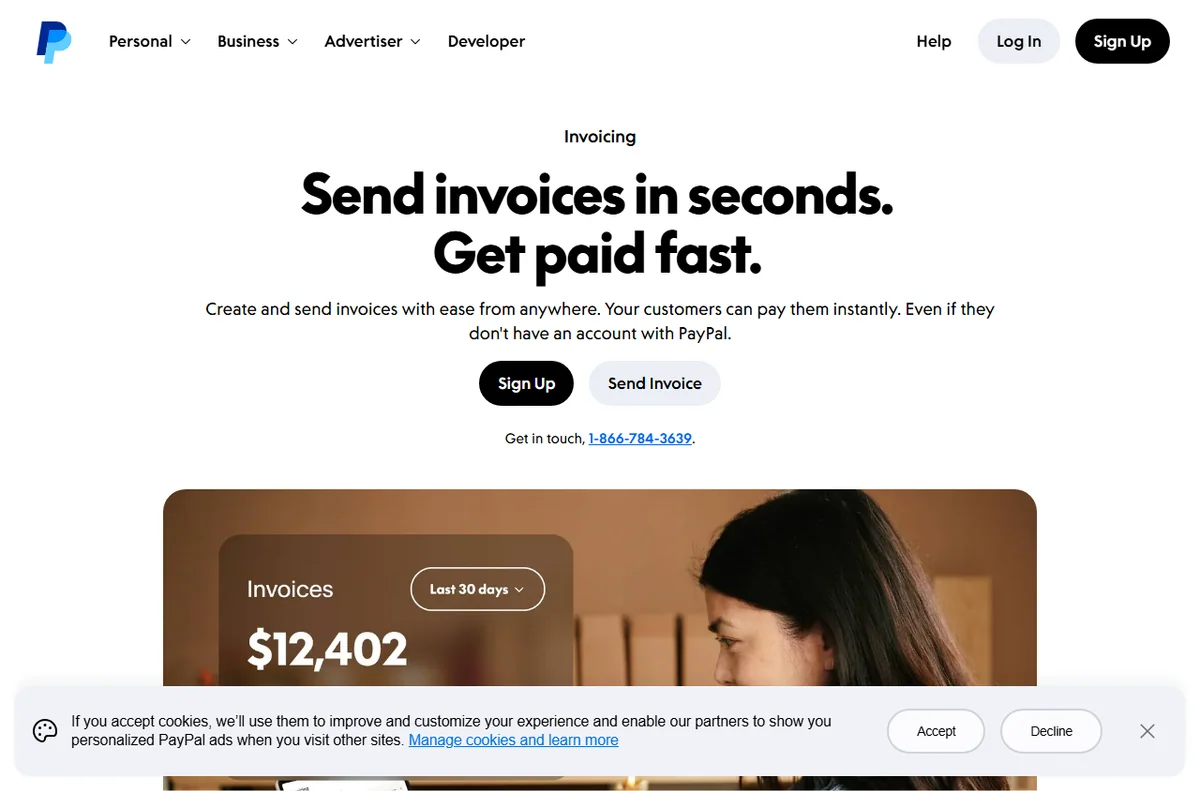
    PayPal invoicing page to create and send invoices
    PayPal invoicing (image: paypal.com)

    Invoicing and getting paid

    For service businesses, invoicing is usually the first feature worth learning. You create an invoice, send it by email and the customer pays online without a back-and-forth about bank details.

    The quiet benefit is the paper trail. Each invoice carries a status, so you can see what is paid, what is outstanding and what has been refunded without rebuilding the picture in a spreadsheet.

    PayPal accept payments page for online checkout buttons
    PayPal accept payments (image: paypal.com)

    Checkout buttons and site payments

    If you run an online store, PayPal can sit beside your card processor as an extra option. The setup ranges from a simple button for a single product to a full gateway integration on a platform.

    The decision is mostly about how much control you want. A button is fast to add; a full integration gives you a smoother flow and better reporting, at the cost of more setup time.

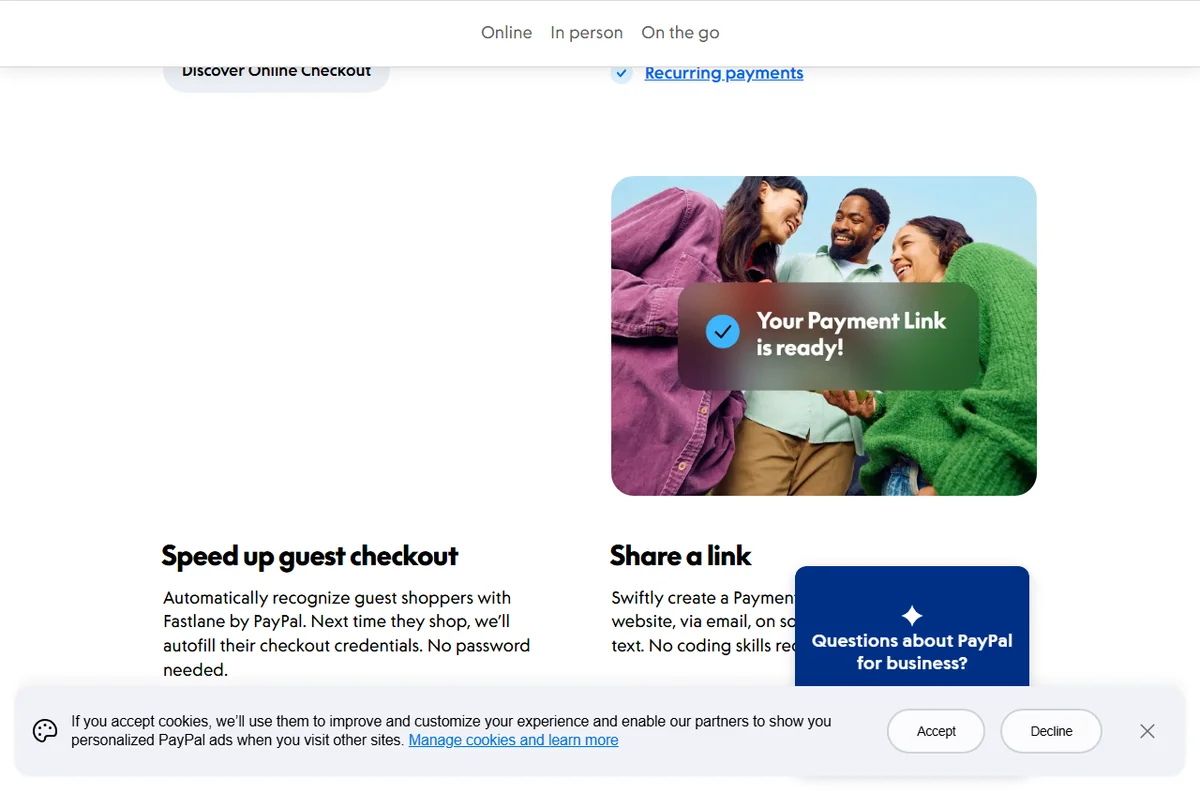
    PayPal payments page section covering recurring billing and subscriptions
    PayPal recurring payments (image: paypal.com)

    Recurring billing and subscriptions

    Memberships, retainers and box-of-the-month services all depend on repeat charges. PayPal supports this pattern so you are not manually re-invoicing each cycle.

    Before switching recurring revenue on, decide how you will handle failed payments and cancellations. Those two paths cause more support tickets than the charges themselves.

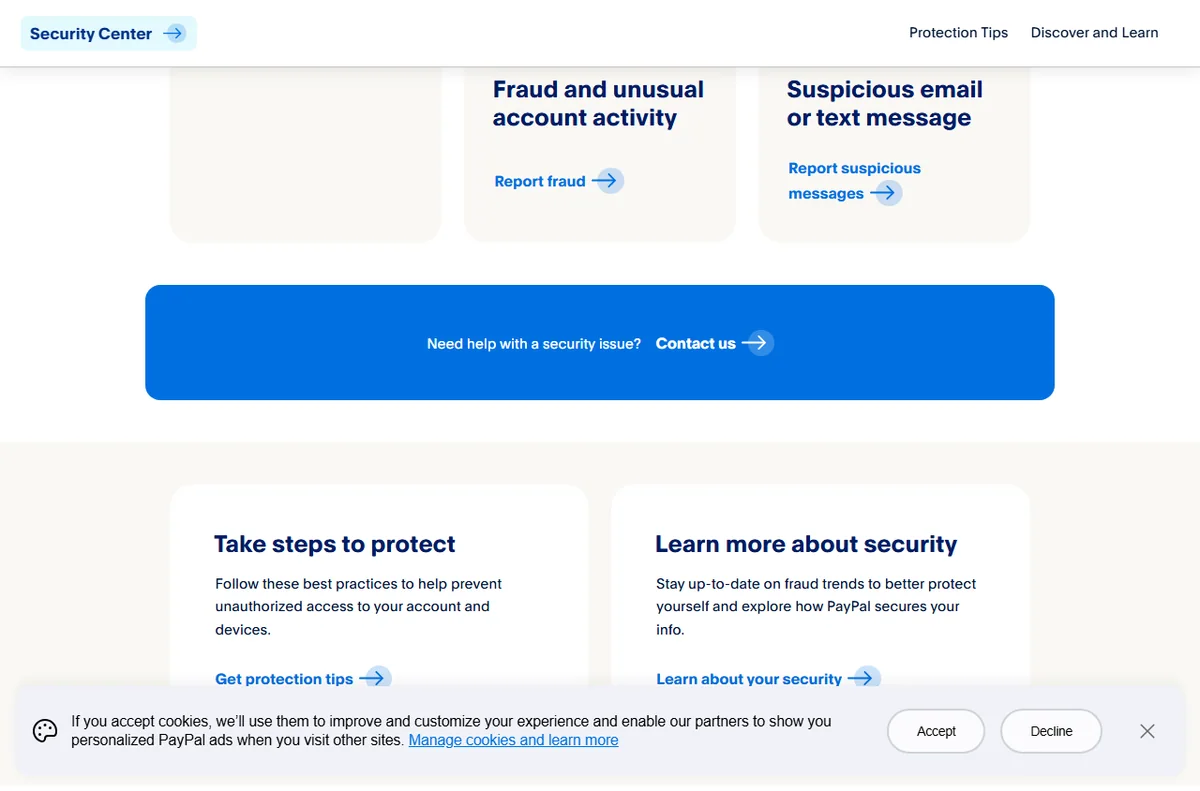
    PayPal Security Center section on disputes, chargebacks and fraud
    PayPal disputes and fraud (image: paypal.com)

    Refunds and disputes

    Refunds are a normal cost of selling, and handling them quickly protects your standing with buyers. PayPal lets you reverse a payment directly, with the original transaction as the reference.

    Disputes are the other side of the same coin. Respond with clear evidence, keep the timeline tight, and treat the process as a reason to document your sales terms up front.

    PayPal business page section on sales reporting and insights
    PayPal reporting (image: paypal.com)

    Reporting and reconciliation

    Every payout carries a fee, and those fees need to reach your books. Downloading a transaction report at a regular interval keeps reconciliation to minutes instead of hours.

    If you sell through more than one channel, export from each and match them against your platform data. Consistency matters more than perfection here.

    Where to start

    You do not need every feature on day one. Use the table below to pick the first two that match how you actually sell today.

    Way you sell Best PayPal feature When to prioritise it
    Occasional invoicesInvoicingYou bill a handful of clients and want a record
    Own-website salesCheckout buttons or gatewayYou run a store and want PayPal beside cards
    MembershipsRecurring billingRevenue depends on repeat charges
    Returns and refundsRefunds and disputesYou sell physical goods people send back
    Monthly bookkeepingReportingYou reconcile every month and need clean data
    Based on publicly documented behaviour, checked October 8, 2026.
    PayPal merchant fees page showing transaction pricing
    PayPal fees (image: paypal.com)

    Where this fits in your wider stack

    This page is one part of a wider path. Compare the two big names in the Wise vs PayPal comparison, then review the best payment gateways for small business and the best money transfer services. When you are done, the payments hub keeps the rest of the stack in one place.

    Frequently asked

    Should I use PayPal as my only payment method?

    Usually not. PayPal works best alongside a card processor, so buyers who prefer a card are not turned away and buyers who trust PayPal have their option.

    How many PayPal features do I need on day one?

    Pick the one or two that match how you sell right now. Adding invoicing when you mostly run a store, or the reverse, just creates admin.

    What slows refunds down?

    Unclear return terms and slow replies. Documenting your policy and answering disputes with evidence keeps the process predictable.

    How do I keep PayPal fees out of my books by accident?

    Export a transaction report on a fixed schedule and reconcile it against your platform data, so fees are recorded rather than quietly absorbed.

    Put PayPal to work in your business

    Start with the feature that matches how you sell today, then grow from there.

    Referral link — we may earn a reward if you sign up, at no extra cost to you. We are an independent publisher. See our Affiliate Disclosure.

  • How to Set Up PayPal: Business Account, Step by Step

    How to Set Up PayPal: Business Account, Step by Step

    Home / Payments / Guides / How to set up PayPal

    Tutorial · payments · updated October 8, 2026

    How to set up PayPal: a practical walkthrough

    Setting up PayPal is mostly a matter of picking the right account type, finishing verification and connecting the account to how you already sell. The steps are short, but the order matters, so this walkthrough takes them one at a time.

    PayPal official homepage for sending and accepting payments
    PayPal official homepage (image: paypal.com)

    Independent analysis. This page may contain affiliate links. Some links here are referral links; if you sign up through one we may earn a reward at no extra cost to you, and it never changes what we recommend. We are an independent publisher and are not affiliated with, endorsed by, or an official partner of any tool mentioned. See our Affiliate Disclosure.

    TL;DR

    • Choose a business account from the start if you sell at all.
    • Verification is what unlocks receiving and withdrawing money.
    • Connect PayPal to your checkout, invoices or in-person sales.
    • Run one small live test payment before you announce anything.
    • Skip pricing questions for now; check the official pricing page.

    On this page: What this covers · Before you start · Step 1 — Choose the right account type · Step 2 — Open and upgrade the account · Step 3 — Verify identity and bank details · Step 4 — Connect PayPal to how you sell · Step 5 — Take a first test payment · Choosing your setup path · Where this fits in your wider stack

    What this covers

    PayPal is one of the most widely recognised ways to send and receive money online, and for a small business it doubles as a checkout option and an invoicing tool. The setup itself is quick, but the order of the steps matters: get the account type right, then verify, then connect payments.

    This guide walks through a business account setup end to end. It does not quote prices or plan limits, because those change; check the official pricing page for current figures before you commit.

    Before you start

    • Your legal business details exactly as they appear on official records.
    • A business email address you intend to keep long term.
    • A bank account and, where relevant, a card for verification.
    • A rough idea of where you sell: your own site, a marketplace, invoices or in person.
    • Ten quiet minutes, because verification may ask for document uploads.
    PayPal account selection and sign-up page for personal and business accounts
    PayPal sign-up and account types (image: paypal.com)

    Step 1 — Choose the right account type

    PayPal separates personal and business accounts. A personal account is fine for occasional purchases, but it lacks the business tooling: invoicing, multiple users and the ability to trade under a business name.

    If you sell at all, start with a business account. It takes slightly longer to open, but converting later is more disruptive than choosing correctly now.

    PayPal business solutions page for merchant accounts
    PayPal business solutions (image: paypal.com)

    Step 2 — Open and upgrade the account

    1. Create the account with your business email and a strong, unique password.
    2. Choose the business account option during signup, or upgrade an existing personal account from the settings area.
    3. Enter the legal business name, address and type so they match your registration documents.
    4. Add a contact number you actually answer, since it may be used for verification.
    PayPal Security Center page for account protection and verification
    PayPal Security Center (image: paypal.com)

    Step 3 — Verify identity and bank details

    Verification is what turns a limited account into one that can hold and withdraw money. Expect to confirm your email, add a bank account and, in most cases, upload identity documents for the account owner.

    Business accounts often require additional proof such as a registration document. Submit clear, uncropped images the first time; rejected documents are the most common cause of delay.

    PayPal accept payments page for online and in-person checkout
    PayPal accept payments (image: paypal.com)

    Step 4 — Connect PayPal to how you sell

    With verification under way, connect PayPal to your selling channels. The exact buttons differ, but the categories are the same.

    • Website checkout: add a payment button or a gateway integration to your store.
    • Invoices: send a payable invoice by email and track its status.
    • In person: use a card reader or QR code where PayPal supports it in your region.
    • Marketplaces: link the account where the platform pays sellers through PayPal.
    PayPal invoicing page to create and send an invoice online
    PayPal invoicing (image: paypal.com)

    Step 5 — Take a first test payment

    Before announcing anything, run a small live test. Buy something from your own store with a different account, confirm the money arrives, then refund it.

    This single test surfaces the problems that matter: wrong currency, missing tax settings, a broken return URL. Fixing them now is cheaper than fixing them after a customer hits them.

    PayPal merchant fees page showing transaction pricing
    PayPal fees (image: paypal.com)

    Choosing your setup path

    Most small businesses fall into one of a few patterns. Find the row that matches your situation and start there.

    Situation Suggested approach Why
    Occasional sales, one personBusiness account, single userKeeps reporting simple while still allowing a business name
    Selling on your own websiteBusiness account plus a gateway integrationGives a familiar checkout option alongside cards
    Invoice-based servicesBusiness account with invoicingTracking and reminders are built in
    Growing teamBusiness account with multiple usersAvoids sharing one login between people
    Based on publicly documented behaviour, checked October 8, 2026.
    PayPal digital wallet app for managing money
    PayPal digital wallet (image: paypal.com)

    Where this fits in your wider stack

    If you are still choosing between providers, start with the independent Wise vs PayPal comparison, then browse the wider payments hub. For a fuller view of the alternatives, weigh the best payment gateways for small business and the best money transfer services before you settle on a primary account.

    Frequently asked

    Do I need a business account to sell?

    If you sell regularly, yes. A business account unlocks invoicing, multiple users and a business name, and it avoids the disruption of converting a busy personal account later.

    How long does verification take?

    It depends on how quickly you supply documents and how clearly they scan. Submitting correct, uncropped files the first time is the single biggest factor you control.

    Can I use PayPal and another provider together?

    Yes. Many small businesses keep PayPal alongside a card gateway so buyers can choose the method they already trust.

    What should I check before going live?

    Confirm the currency, tax settings and return URLs with one small test payment, then refund it. That test catches the mistakes customers would otherwise find.

    Ready to take payments with PayPal

    Open a business account and work through the steps above at your own pace.

    Referral link — we may earn a reward if you sign up, at no extra cost to you. We are an independent publisher. See our Affiliate Disclosure.

  • How to Use Thinkific for a Small Business: Five Plays

    How to Use Thinkific for a Small Business: Five Plays

    Home / Course Platforms / Guides / How to use Thinkific for a small business

    Use case · course platforms · updated October 8, 2026

    How to use Thinkific for a small business

    A small business often has knowledge worth packaging: how you onboard clients, train staff, or teach a skill. Thinkific turns that knowledge into a paid or internal course. These five plays show where it fits.

    Thinkific homepage for selling online courses
    Thinkific official homepage (image: thinkific.com)

    Independent analysis. This page may contain affiliate links. Some links here are referral links; if you sign up through one we may earn a reward at no extra cost to you, and it never changes what we recommend. We are an independent publisher and are not affiliated with, endorsed by, or an official partner of any tool mentioned. See our Affiliate Disclosure.

    TL;DR

    • Thinkific suits knowledge that is repeatable, not one-off advice.
    • Client onboarding and staff training are often the fastest internal wins.
    • A low-priced entry product can feed a higher-priced service.
    • Course-first means less marketing built in; pair it with your own email tool if needed.
    • Confirm current plan limits and fees on Thinkific’s own pricing page.

    On this page: Why a small business uses Thinkific · Five plays to consider · Which play fits · What the plays share · Guardrails · Where this fits

    Thinkific courses feature page
    Thinkific courses (image: thinkific.com)

    Why a small business uses Thinkific

    The trigger is repetition. When you explain the same onboarding, process or skill again and again, a course stops being a product and becomes a tool: it teaches once and runs forever.

    Thinkific is course-first, so the delivery experience is strong. If you need heavy marketing automation, pair it with a separate email tool.

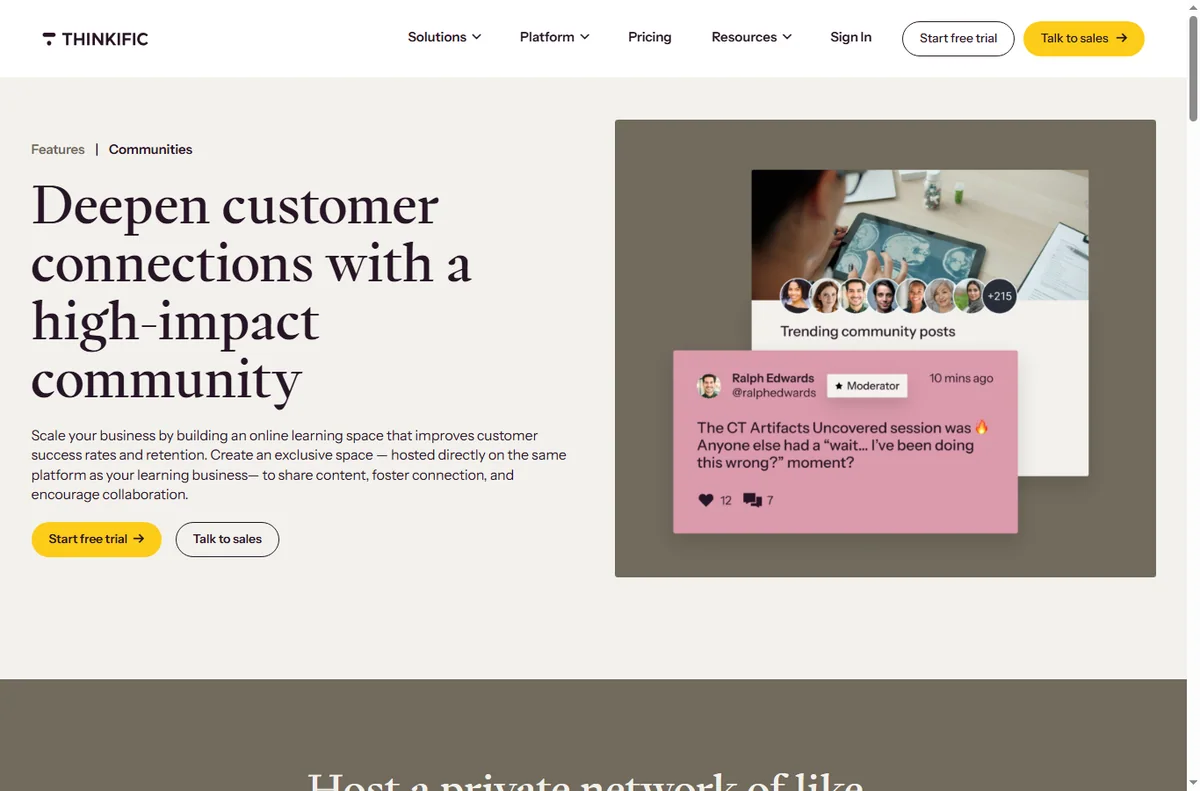
    Thinkific learning communities feature page
    Thinkific learning communities (image: thinkific.com)

    Five plays to consider

    • Sell a paid course — package a skill into structured lessons.
    • Onboard clients — teach new clients how to work with you before the first call.
    • Train staff — consistent internal training without repeating yourself.
    • Package a workshop — turn a live session into an evergreen course.
    • Low-priced entry product — a small paid course that leads to a bigger service.
    Thinkific landing pages feature page
    Thinkific landing pages (image: thinkific.com)

    Which play fits your business

    Business Best play Why
    Coach or consultantPaid course or entry productKnowledge is the product
    Service businessClient onboardingCuts repeated explanations
    Team of any sizeStaff trainingConsistency and time saved
    TrainerWorkshop to courseMultiply a live session
    Based on publicly documented behaviour, checked October 8, 2026.

    What the plays share

    Each play needs a defined outcome, a short path to it, and a reason to keep going to the end. Thinkific gives you the delivery; you supply the clarity of the promise.

    Keep lessons short and outcome-focused. Students finish small, specific lessons; they abandon long, vague ones.

    Thinkific payments feature page
    Thinkific payments (image: thinkific.com)

    Guardrails for a small business

    • Start with the play that saves or earns the most for the least build time.
    • Ship one course before starting a second.
    • Track completion, not just enrolment — it shows whether the course works.
    • Keep a welcome email so students know what to do first.
    Thinkific pricing page with plan tiers
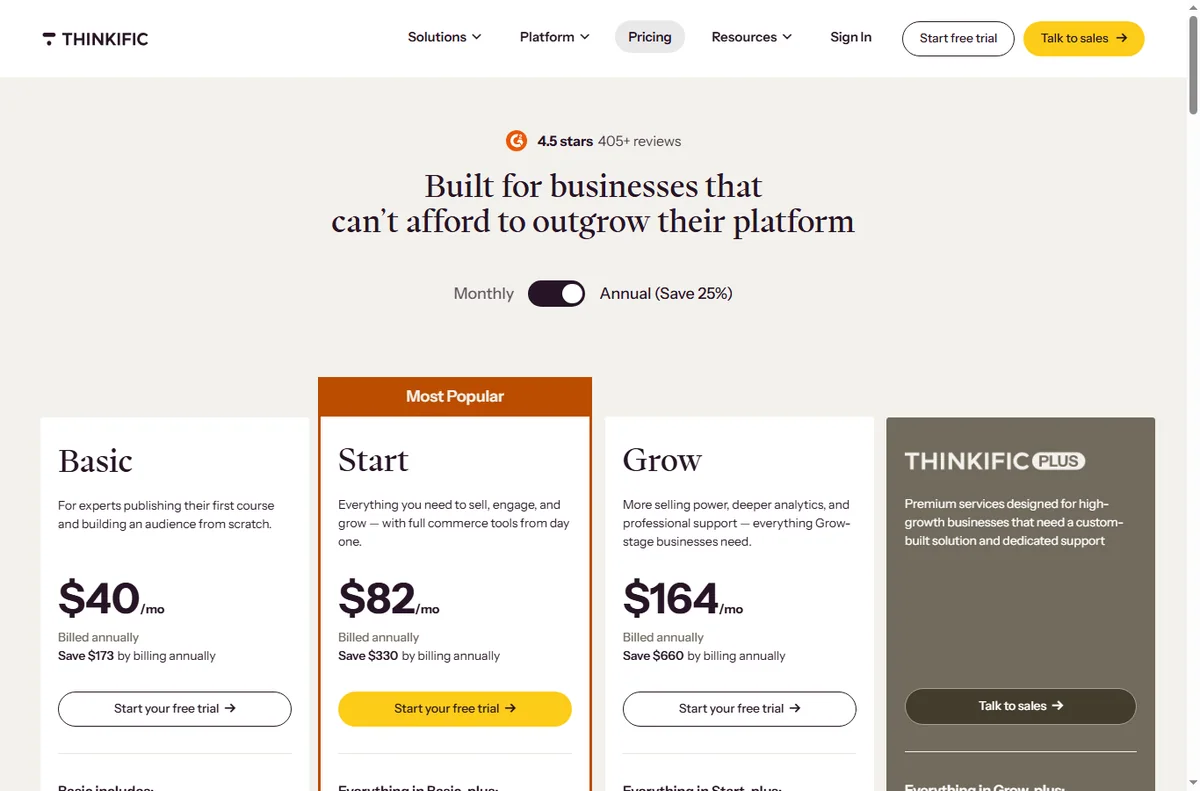
    Thinkific pricing (image: thinkific.com)

    Where this fits in your wider stack

    Read the independent Thinkific review and start from the course platforms hub. Comparing options? See Teachable vs Thinkific and Kajabi vs Thinkific. For a shortlist, read best course platforms.

    Frequently asked

    Is Thinkific only for selling courses?

    No. Many businesses use it internally for client onboarding and staff training, where the “student” is not a paying customer.

    How is it different from an all-in-one?

    Thinkific is course-first, so delivery is strong and marketing is lighter. An all-in-one bundles more but imposes its way of working.

    Which play should I start with?

    The one that recurs most often in your week. If you onboard clients repeatedly, start there.

    How do I know a course is working?

    Look at completion and, for paid courses, repeat or upsell. High enrolment with low completion means the course needs work.

    Turn repeated knowledge into a course

    Pick the play that saves the most time or earns the most, and ship one course.

    Referral link — we may earn a reward if you sign up, at no extra cost to you. We are an independent publisher. See our Affiliate Disclosure.

  • How to Set Up Thinkific: Account, Course and Checkout

    How to Set Up Thinkific: Account, Course and Checkout

    Home / Course Platforms / Guides / How to set up Thinkific

    Tutorial · course platforms · updated October 8, 2026

    How to set up Thinkific: from account to first enrolment

    Thinkific focuses on course delivery: build a course, price it and take payment. This walkthrough covers the account, your first course, pricing and a test enrolment so you can launch without touching every setting.

    Thinkific homepage for selling online courses
    Thinkific official homepage (image: thinkific.com)

    Independent analysis. This page may contain affiliate links. Some links here are referral links; if you sign up through one we may earn a reward at no extra cost to you, and it never changes what we recommend. We are an independent publisher and are not affiliated with, endorsed by, or an official partner of any tool mentioned. See our Affiliate Disclosure.

    TL;DR

    • Thinkific is course-first: strong delivery, lighter on marketing than all-in-one tools.
    • Build one small course fully before adding more.
    • Set pricing and a checkout before you invite students.
    • Run a test enrolment to confirm access works.
    • Confirm current plan limits, fees and pricing on Thinkific’s own pricing page.

    On this page: What setting up Thinkific means · Before you start · Create your account · Build the course · Add pricing and checkout · Enrol and test · Common setup mistakes · Where this fits

    What setting up Thinkific actually means

    Thinkific is built around the course experience: lessons, quizzes and student progress. Setup is therefore content-first, with checkout and marketing as supporting pieces.

    The milestones are: account, course content, pricing and checkout, then a test enrolment. Do them in order and you are live.

    Before you start

    • The outcome your course delivers, stated in one sentence.
    • An outline of modules and lessons.
    • Your price and whether it is one-time or subscription.
    • A payment method, and a company name for receipts if relevant.
    Thinkific sign-up screen to create an account
    Thinkific sign-up (image: thinkific.com)

    Step 1 — Create your account

    Sign up, name your school, and finish onboarding. Choose a plan based on how you will charge and what fees apply; changing later is possible but do it before a launch if you can.

    The free or entry tiers are fine to learn on. Upgrade when you are ready to sell, not while you are still outlining the course.

    Thinkific courses feature page
    Thinkific courses (image: thinkific.com)

    Step 2 — Build the course

    Create a course, then add chapters and lessons. Publish one lesson completely — content plus any file or quiz — before building the next so students always have a coherent path.

    Keep the first course tight. A short course that delivers its promise is easier to sell and easier to improve than a sprawling one.

    Thinkific payments feature page
    Thinkific payments (image: thinkific.com)

    Step 3 — Add pricing and checkout

    Set a price and choose one-time or subscription. Add the checkout page and, if you want a sales page, a simple one with a single call to action and a clear price.

    Decide how students get access after payment: instant enrolment is simplest. Test the flow before you promote it.

    Thinkific landing pages feature page
    Thinkific landing pages (image: thinkific.com)

    Step 4 — Enrol and test

    Enrol yourself as a student through checkout, using a discount code if the platform allows. Confirm the course unlocks, lessons play, and any quiz records.

    Also check the confirmation email and the sign-in experience on mobile. The first impression happens before the first lesson.

    Common setup mistakes

    Mistake Why it hurts Fix
    Building too much content firstYou never launchShip one complete course
    Skipping a test enrolmentAccess bugs hit buyersEnrol yourself first
    No clear price on the pageVisitors cannot decideShow price and one call to action
    Ignoring mobileMany students learn on phonesCheck lessons on a phone
    No onboarding emailStudents arrive confusedSend a welcome with next steps
    Based on publicly documented behaviour, checked October 8, 2026.
    Thinkific pricing page with plan tiers
    Thinkific pricing (image: thinkific.com)

    Where this fits in your wider stack

    Read the independent Thinkific review and start from the course platforms hub. Comparing tools? See Kajabi vs Thinkific and Teachable vs Thinkific. For cost, read the course platform pricing comparison.

    Frequently asked

    Is Thinkific good for beginners?

    Yes. The course builder is straightforward and course-first, which suits people who want to teach rather than configure a whole marketing stack.

    Can I sell a subscription?

    You can offer one-time or subscription pricing depending on your plan. Check the plan that matches how you want to charge.

    Do I need a separate website?

    Not always. Thinkific provides course and sales pages; some owners add their own site for a fuller brand presence.

    How do I test without paying myself?

    Use a discount code or a test transaction where supported, then refund or ignore it. The goal is to confirm access, not revenue.

    Ship your first course on Thinkific

    Build one complete course, set a clear price, and test enrolment before launch.

    Referral link — we may earn a reward if you sign up, at no extra cost to you. We are an independent publisher. See our Affiliate Disclosure.

  • Common Semrush Problems and How to Fix Them

    Common Semrush Problems and How to Fix Them

    Home / SEO Tools / Guides / Common Semrush problems

    Problem solving · seo tools · updated October 8, 2026

    Common Semrush problems and how to fix them

    Most Semrush problems are interpretation problems, not software faults. The data is estimated, the scores are relative, and the reports can overwhelm a beginner. Here is how to diagnose and work around each.

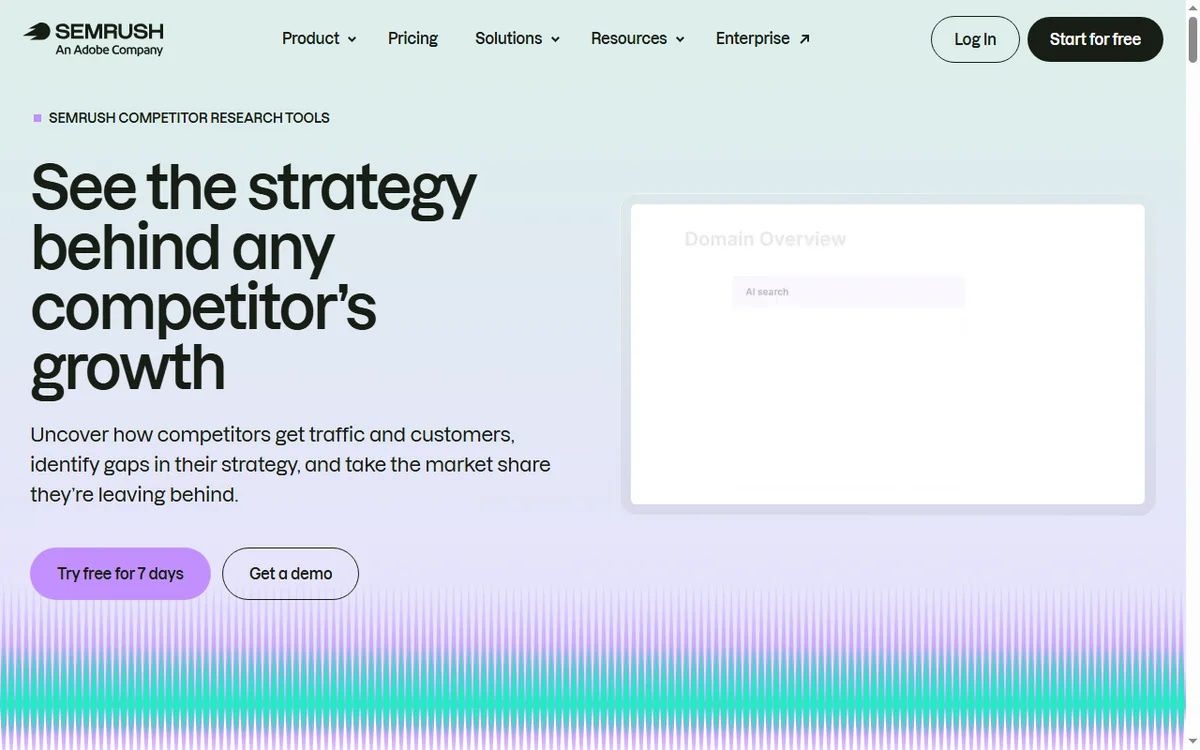
    Semrush homepage for SEO and competitor research
    Semrush official homepage (image: semrush.com)

    Independent analysis. This page may contain affiliate links. Some links here are referral links; if you sign up through one we may earn a reward at no extra cost to you, and it never changes what we recommend. We are an independent publisher and are not affiliated with, endorsed by, or an official partner of any tool mentioned. See our Affiliate Disclosure.

    TL;DR

    • Keyword difficulty is relative, not a precise pass/fail score.
    • Estimated volumes can be far off for niche or local terms; verify before you commit.
    • Credit or limit errors usually mean you hit a plan cap, not a bug.
    • Overwhelming reports are fixed by choosing one question per session.
    • Export raw data and sanity-check it against search console.

    On this page: Diagnose the problem type · Keyword difficulty confuses · Data looks wrong · Credit or limit errors · Reports overwhelm · How to verify · Where this fits

    Diagnose the problem type

    Before changing anything, decide which category you are in: a score you do not understand, a number you doubt, a limit you hit, or a report that is too big to act on. Each has a different fix, and none of them is “the tool is broken.”

    Semrush keyword research and difficulty feature page
    Semrush keyword research (image: semrush.com)

    Keyword difficulty confuses

    Difficulty is a relative measure of how hard the current top results look, not a guarantee. A term scoring high can still be winnable with a better page or on a long-tail variation, and a low score can hide strong sites.

    What you see What it means What to do
    High difficultyEstablished pages dominateTarget long-tail variants first
    Low difficulty but no trafficDemand may be tiny or localCheck volume and intent
    Rising difficultyCompetition changedRe-check before investing
    Based on publicly documented behaviour, checked October 8, 2026.
    Semrush competitor analysis feature page
    Semrush competitor analysis (image: semrush.com)

    Data looks wrong

    Estimated volumes are modelled, so they can diverge from reality — especially for local, niche or brand-new terms. Treat a surprising number as a prompt to verify, not a fact.

    Compare against your own search console impressions for terms you already rank for. If the estimates are consistently off in your niche, weight them less in decisions.

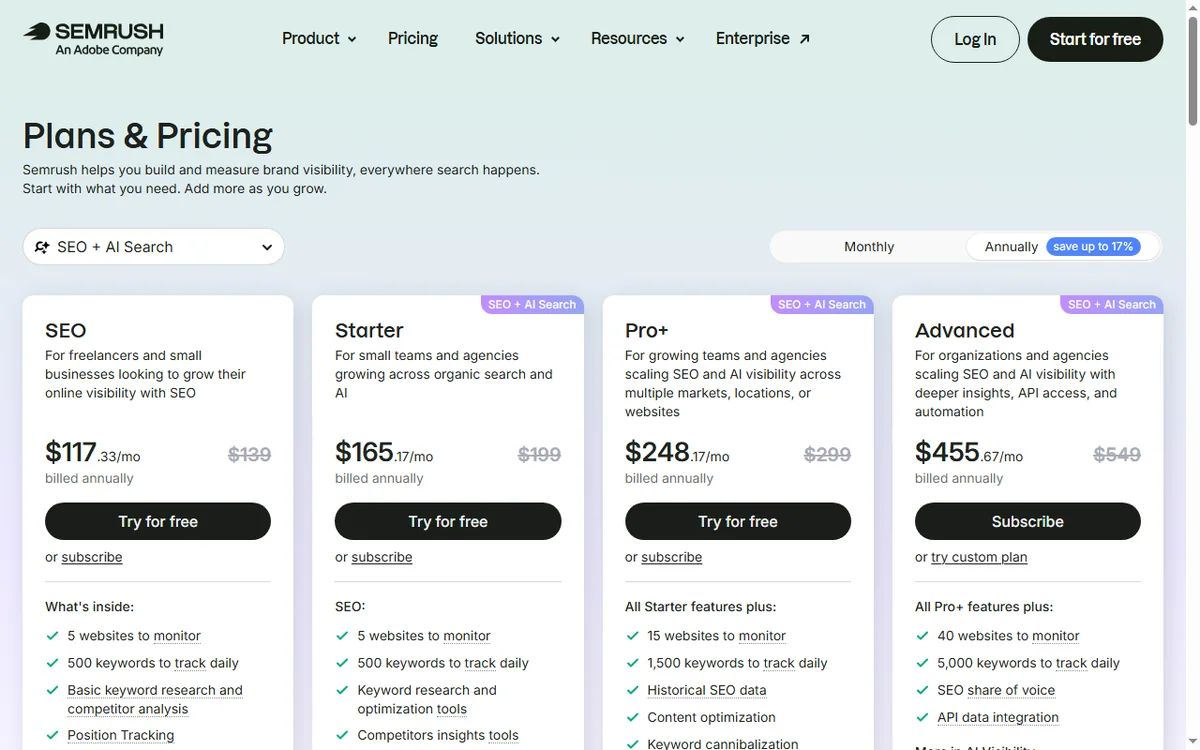
    Semrush pricing page showing plan credits and limits
    Semrush pricing (image: semrush.com)

    Credit or limit errors

    Most “errors” are plan limits: a report that needs more units than you have left, or a feature reserved for a higher tier. Check the usage meter and the report size before assuming a fault.

    Batch work and export what you need in one pass rather than re-running reports you have already seen.

    Semrush position tracking reports feature page
    Semrush position tracking (image: semrush.com)

    Reports overwhelm

    The suite can show so much that nothing gets done. Fix this by starting each session with one question: what should I write next, why is this page losing, who links to my competitor. Answer that, then stop.

    Save the useful exports in one place so you are not re-running the same report each week.

    Semrush site audit feature page for verifying issues
    Semrush site audit (image: semrush.com)

    How to verify before you act

    1. Check the estimate against search console impressions.
    2. Look at the actual top results for the term, not just the score.
    3. Confirm the intent matches your page before you optimise for it.
    4. Act on one or two changes, then measure the result.
    Semrush SEO toolkit feature page
    Semrush SEO toolkit (image: semrush.com)

    Where this fits in your wider stack

    Read the independent Semrush review and start from the SEO tools hub. If cost or limits are the issue, see the Semrush pricing guide. Ground the work in the on-page SEO guide and best SEO tools for small business.

    Frequently asked

    Why does keyword difficulty feel wrong?

    It is a relative estimate of the current results, not a prediction. Verify by looking at the actual top pages and your own search data.

    Why are volumes so different from Google Keyword Planner?

    Both are estimates built differently. Use them for direction and verify against real search console impressions.

    Why am I out of credits?

    Reports and features consume units. Check the usage meter and export what you need in one pass rather than re-running.

    Where should a beginner start?

    One question per session: pick the term or page you are working on and open only the toolkits that answer it.

    Get answers from the data, not more data

    Use Semrush to answer one question at a time and verify before you invest.

    Referral link — we may earn a reward if you sign up, at no extra cost to you. We are an independent publisher. See our Affiliate Disclosure.